Navigate / search

Let your light Shine the way! ~ Dusty Attic ~ Tutorial

Welcome back, today I have a project to share with you for Dusty Attic using the new release dusty Moroccan Lamps and French Border. This canvas has a lot of dimension on it! And in creating this dimension on the intricate pieces I worked out an easier way of creating varying depths to your pieces. See the tutorial below for this simple and effective technique.
Even though this looks like a shadow box it is just a normal canvas with a chipboard border.
 
Dusty Attic: French Garden Border – DA0845

Moroccan Lamps – DA0835
Dusty in Colour:
Capri – DA0915
Oceania – DA0912
Navajo White – DA0903

Dimensional Lamp Tutorial

For this tutorial I have used the Dusty in Colour Paints, a gold sharpie pen. A sponge for painting. Then to add the dimension you just need some strips of chipboard off cuts and some tiger grip glue or something similar.


To get the painted effect on the lamps I first painted the lamp with the Capri paint. Then using the Gold Sharpie (Love these metallic sharpies I got them in a pack with gold, silver and a bronze.)
fill in the lines on the lamp.

To soften the look I have sponged some of the Oceania paint over the lamps and very lightly over the gold pen lines.

To add even more dimension I have used my finger to add some white paint highlights over the lamps.
Now the secret to getting great dimension of varying heights is to use chipboard strips. you can even used the offcuts from the pieces the chipboard comes in. Just cut them into strips to what ever height you want to raise your pieces. To get this effect before I would add layers of foam tape. But not only are the chipboard strips easier to hide behind intricate pieces you can cut them, to what ever height you like. Add the strips to your chip pieces using a strong glue then glue the chip pieces to your work. So happy with how effective this is!

I painted the chipboard with brown paint before cutting it into strips. You can paint the chipboard to to match the background of your page so that it is less noticeable behind your chip pieces. You can also bend the chipboard into curves if needed too!

I have used narrow chipboard strips to create the border around this canvas. I then added the french border to the top of the chipboard frame to give it more of a box look.


I hope you enjoy this tutorial!!


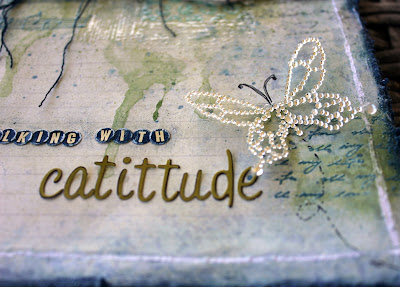
Walking with Catitude * Donna Salazar Designs* & Video Tutorial on Background Stamping

OK, I think I am getting over my week, having a day just creating yesterday helped a lot! Will share more of that when I photograph the projects. It has been a nice change of pace for the weekend. I am feeling a lot better now! Thank you everyone for your beautiful words of advice and support! Really does mean a lot! So Thank you from the bottom of my heart!

On some other news I have just announced I will be having my first weekend workshop in Mackay on the 16th & 17th of March. I have just put a call out for expressions of interest, also if any one knows of any good venue’s I should look into I would really appreciate it!

I am re-posting this project that was recently published in Scrapbook Creations Magazine

No.97

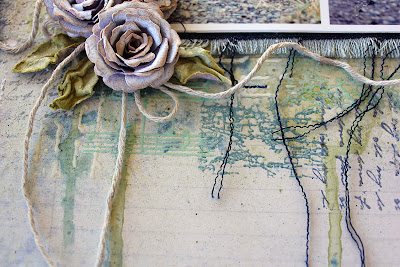
Welcome back, Today I have another video tutorial on creating your own background with Donna Salazar’s stamps & Mix’d Media Inx & Smooch Sptitz. I have also used the Spellbinders Bitty Blossoms  on this layout! They are so gorgeous and perfect for creating flowers to suit any project.


 To give your bling butterflies more movement stick them to a piece of acetate, then cut it out and glue the center of the butterfly down with the wings slightly bent up.
 After cutting the leaves from the bitty blossoms, ink with Mossy Mix’d Media Inks then mist with water and crumple up to give the leaves more texture.

Here is the Video Tutorial on creating the patchwork stamped background!

Materials:


Clearsnap
SpellbindersBitty Blossoms

Other Products:
String
Clear Embossing Powder

Butterfly charm
Jenni Bowlin – Reverse Navy Stickers
Websters Pages – Little storytellers Colour Holiday
Plain Copy Paper to make a mask

Adhesives
Helmar Tiger Grip 

Tools

Heat Gun

Thanks for dropping by!
Have a great day!
Cheers
Michelle xx

Freedom ~ Jan ATC & Tutorial ~ Dusty Attic

Welcome to my first Dusty post for 2013. The theme for this months ATC Challenge is Fairies & Flutterbies. These butterflies will soon be available in the next new release.

Flying Chipboard Butterflies – Tutorial

I wanted to create some butterflies with the appearance that they were flying.
This is an easy technique to create movement in your chipboard butterflies.
I have used the new Butterflies #3 that are coming out in the next release.

Step 1: I have used 2 medium and one of the small butterflies.

Step 2: Soak the butterflies in water and separate into 3 layers so 3 butterflies then become 9

Step 3: While the chipboard is still wet curl up the edges of the butterflies, then dry with a heat gun. The heat gun will help the edges curl a little more too.
Step 4: Once dry I have coloured them with Smooch Spritz – Citrus Tickle, then painted the edges of the butterflies with white paint.
Step 5: Use two layers of the butterflies for the medium butterflies. To create the body take a piece of craft wire and add some beads.
Step 6: Then fold the wire around the butterfly going between the antlers and around the back.

Step 7:
To Make the small butterflies I have used each separate layer individually and gently poked the wire through  the middle of the chipboard. Add some PVA glue as you do this to hold it in place.
Materials:
Dusty Attic Chipboard
ATC Chipboard Frame DA0663
Butterflies #3 DA0842

Dusty In Bloom
Mini Roses (Coming Soon)

Other:
Clearsnap – Smooch Spritz – Citrus Tickle, Splash & Ice Rink
Gauze
Wire
Beads

Thanks for Dropping By!
I hope you all have a fabulous year and that all your dreams come true! x
Hugs Michelle xx

Dusty’s on Song with New Release!! & Video Tutorial on the Dusty Attic Door

Dusty Attic have another New Release and it is right up my alley! Lots of birds and powerlines and lots of yummy pieces! I have too many faves in this release to mention!
|
More pics of the Kookaburra’s at my Inlaws in Cooroy QLD. 

I also have a video tutorial on how I did the door!

Materials:

Dusty Attic
Bamboo #1  – DA0703
Mini Birdhouses – DA0706
Mini Birds #1 – DA0723
Birds Nest #2 – DA0721
Birds on a Wire – DA0708
Door #1 – DA0692
Door Handle Plates – DA0681
Dusty in Bloom – Cornsilk & Grassy Knoll

Other

Modeling paste
White Gesso
Rock Salt
Clearsnap – Smooch Spritz- Green Olive, River Mossy
Clearsnap – Mix’d Media INkx – Truffle, Peridot
Glimmer Glam  – Rustic
Glimmer mist Chalkboard – Sprout
Prima – Resin Shabby Chic Bird house
White Cardstock
Lace
Prima Destressing tool
Kaiser Craft Rub Ons – Bonjour
American Crafts Rubons – Accents book 2

Thanks for dropping by!
Have a great day!
Hugs
Michelle x